Easy steps to Paint with coffee.

Step #2
Painting veins and stems

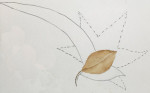
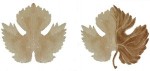
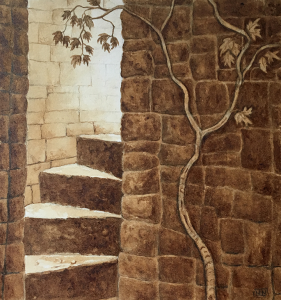
Developing the leaf image  Once your first layer is dry and you will start painting various areas of your first leaf. This will add texture and detail. Keep paper towels nearby because they make it easy to blot out excessive coffee. You will be adding more leaves around and under this first leaf.

Things to pay attention to:
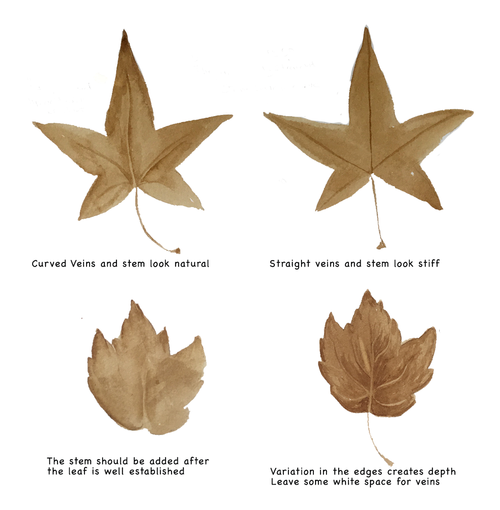
•  Adding veins makes your leaf come alive. Often the veins are white or lighter than the rest of the leaf.  It can be tempting to paint veins dark right away. Try to resist this urge. Remember you can always make them darker by adding a shadow along one side of the vein. Darker hairpin veins can also be added.
•  Add the stem. Keep in mind that most stems are not a straight line but have a natural curve. (See image below) If you wait to add the stem after your basic leaf has started to take form it is easier to see the natural curve of the leaf. That way the stem can be painted in the correct proportion and flow in the right direction.
• Define the leaf edges. The leaf edges hold the character of the leaf and should not be painted with thick stokes around the edge. Natural light and shadows cause the edges to reflect different values and weight.

Look closely at the images below.

leaf-demo

Painting with coffee in three basic steps.

Step #1 Paint a simple shape with coffee

Paint a simple shape with coffee

Paint a simple shape with coffee

Paint the first layer I suggest painting a single leaf but any simple shape will work if you don’t have a leaf.  It can be a circle or triangle – anything to just get started!
Begin by lightly drawing around the edges of the leaf with a pencil. This will establish the edges of where you paint the first layer. Think of it as a page in a coloring book and you will be more at ease about where you will paint. Once the first layer is painted and has dried you can erase the pencil. It is important to let the paper completely dry before you go forward.

Things to pay attention to:

The Left Image shows the first layer painted inside the pencil outline. The Right Image shows how the leaf will develop as more layers and details are painted. Layer by layer the leaf takes form.

The Left Image shows the first layer painted inside the pencil outline. The Right Image shows how the leaf will develop as more layers and details are painted. Layer by layer the leaf takes form.

• The first layer must be completely dry before adding more paint. I recommend having a hairdryer handy because this will speed up the whole process and keep you focused on your progress. If the layer you have just been working on is not completely dry and any new paint added will will just blend into the damp paper. Your new strokes will not be sharp because they will be soaked up by the still wet under layer. This is a Big Deal to remember.

• There may be some remaining pencil lines that could not be erased. This occurs when coffee has been painted over the pencil lines and they become sealed in. Try to keep your initial outlining as light as possible. Remember it is just a guide and not meant to be seen in your final painting.

• Keep in mind that It is OK if some pencil still shows because it can add character to the edges.  Any remaining pencil lines may also be intentionally covered with darker coffee.

Follow this link for the next two steps CoffeeArtWorks.com

COFFEE PAINTING classes and workshops

COFFEE PAINTING classes and workshops provide a new approach painting and drawing.  All levels of skill are welcome. Whether you are a novice or just want to explore more of your own creative possibility  there is something for you in the classes and workshops.

Painting with coffee is monochromatic and therefore it involves working with just one color. You will quickly discover that painting with coffee actually makes painting easier. You will immediately begin to be comfortable with “hands-on” painting and drawing. The workshops open with easy exercises that allow you to loosen up and forget yourself and what you think things should look like. You will be expressing yourself.
There are surprising things that happen only when you are painting with coffee.

Tree Painted with coffee

Old Oak Tree Painted with coffee

Next How to Paint With Coffee Class
Riley Street Art Supplies – San Rafael, CA

Two Saturday Afternoon classes
August 31st and September 7th
2pm -4pm
$35.each or both for $50.
All Materials included.

How to Paint with Coffee workshop

Coffee Painting Workshop
Dads Paint free – Fathers Day Special

coffee-meets-watercolorCoffee Meets Watercolor
Sunday June 16th

1:00 – 3:00pm
$45.  All materials included

The idea of painting with coffee is not threatening because people are familiar with drinking it — it isn’t paint. The technique is similar to watercolor but people find it much easier to work with. It’s user-friendly!
Painting with Coffee also offers unique possibilities when mixed with traditional mediums. Watercolor, colored pencil and graphite provide unexpected colors and textures. Nancy has been drawing and painting for many years, but experimenting with painting with coffee continues to inspire her.  The classes offers new creative possibilities for beginners as well as experienced painters.

Visit Nancy’s website at www.nancynichols.com

stairlight

The Ark -Tiburon Newspaper

The Ark
Nice press about my Coffee Painting show in Tiburon. There is still time left to see the show!

HOURS
Monday – Thursday
10am 5pm

Town of Tiburon Heritage & Arts Commission
1505 Tiburon Boulevard, Tiburon, CA 94920

Coffee Painting Exhibit in Tiburon, California

flyer

Painting with Coffee
May 2019 thru June 2019
Tiburon Town Hall
Reception May 5th 2-4pm

1505 Tiburon Boulevard, Tiburon, CA 94920